The house is decked. The presents are wrapped. And you’re ready to hit the road to see family and friends and celebrate the holidays. Now, your car can match your festive mood with these easy DIY projects. Choose your favorite – or favorites – and get ready to celebrate the season.
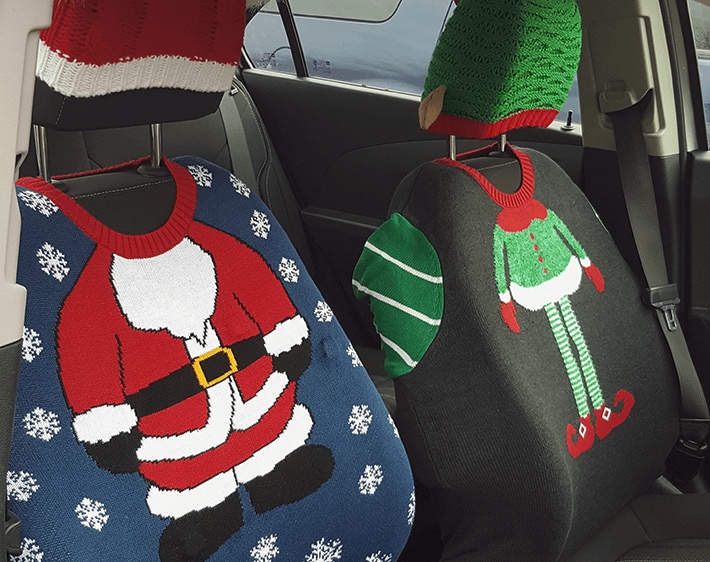
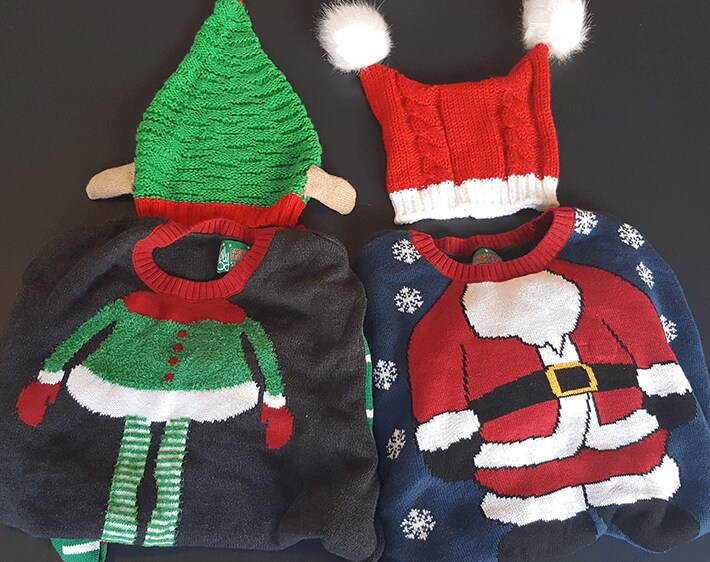
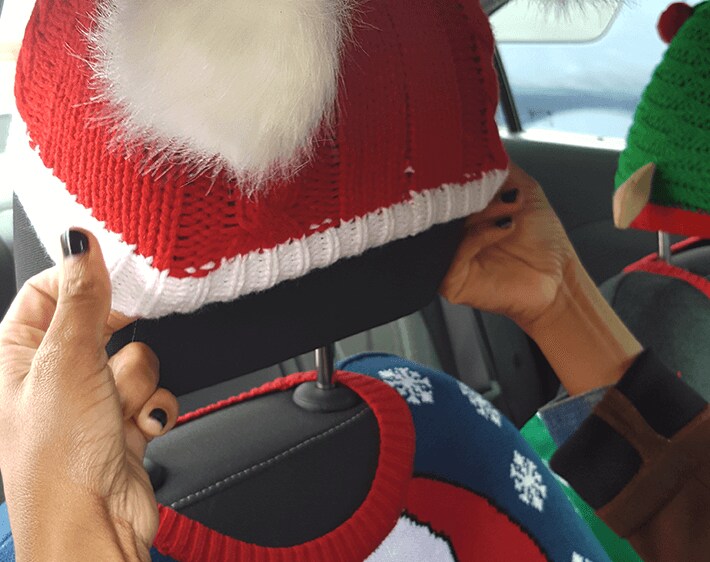
Ugly Sweater Seat Covers
Just grab a few holiday sweaters to make your car merry and bright.
Materials:
- Knit sweaters (XL or larger)
- Holiday hats (Make sure they have some stretch)
Steps:
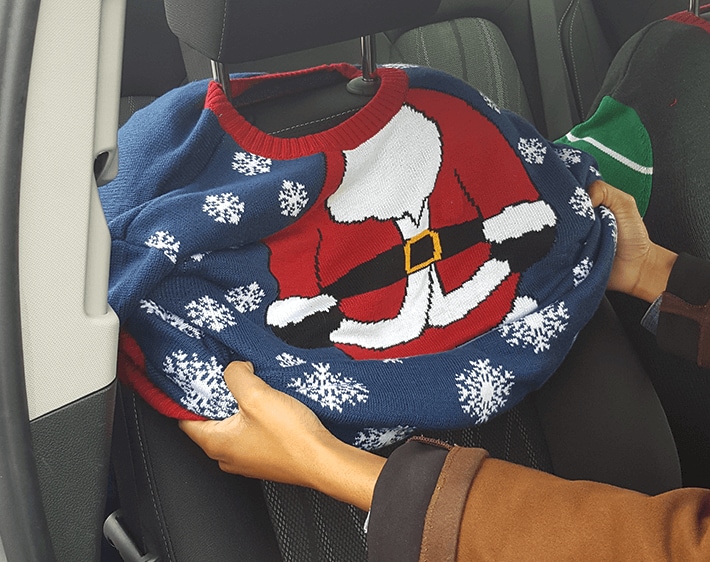
Gather materials
Step 1: Pull sweater over the seat
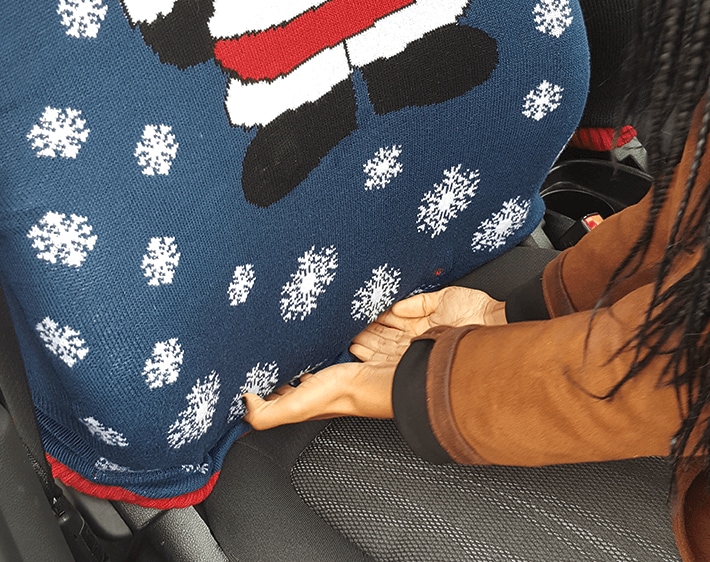
Step 2: Tuck sweater into seat cushion
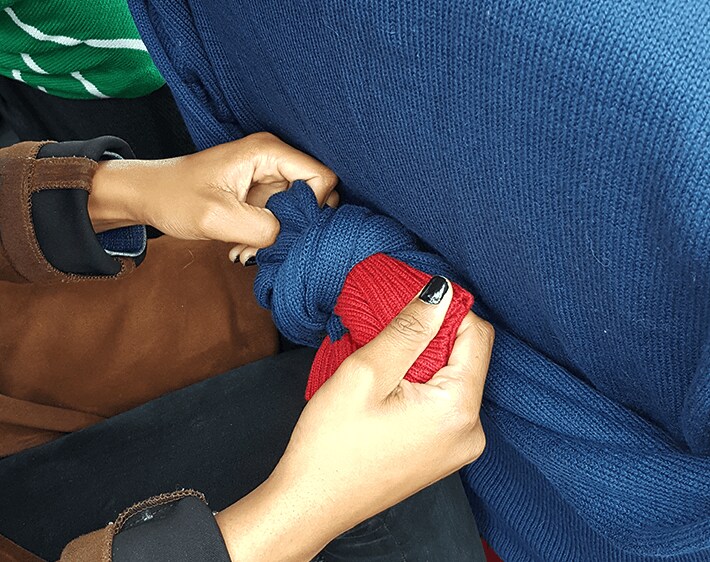
Step 3: Pull arms to the back of the seat and tie in a knot
Step 4: Cover headrest with hat
Step 5: Now sit back and enjoy the ride!
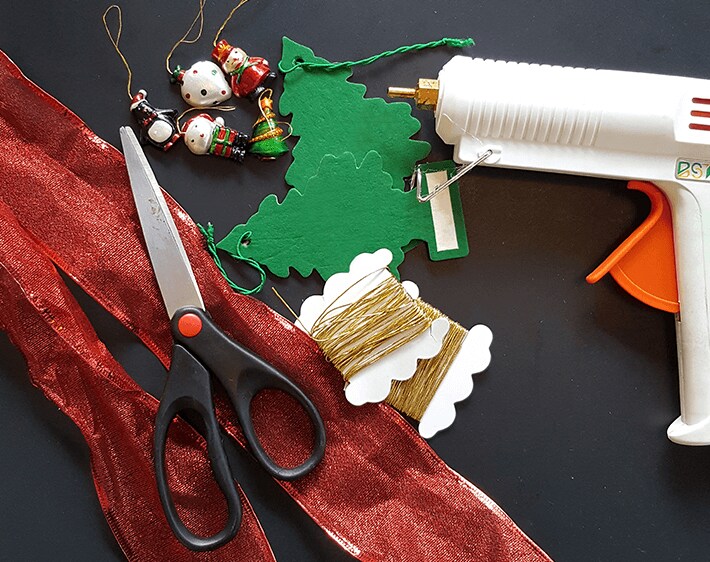
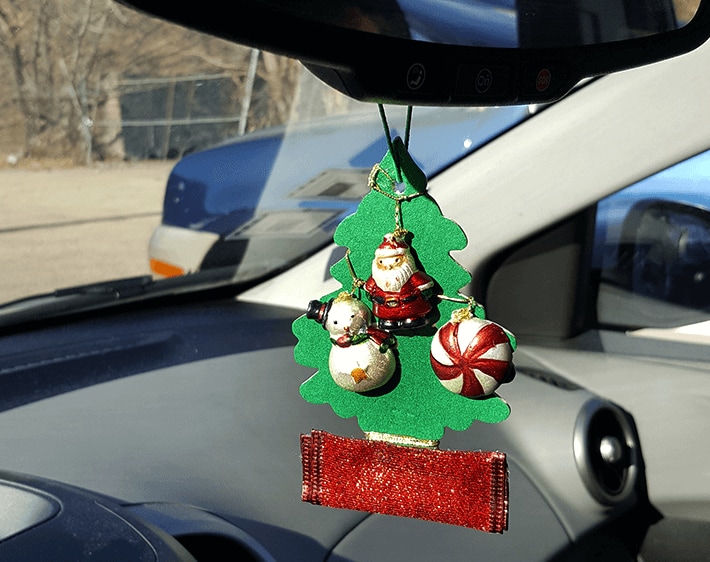
Christmas Tree Air Freshener
Give a traditional car air freshener a holiday makeover.
Materials:
- Pine-scented tree-shaped air freshener
- Mini-ornaments
- Wide ribbon or small fabric scrap
- String
- Scissors
- Glue or glue gun
Steps:
Gather materials
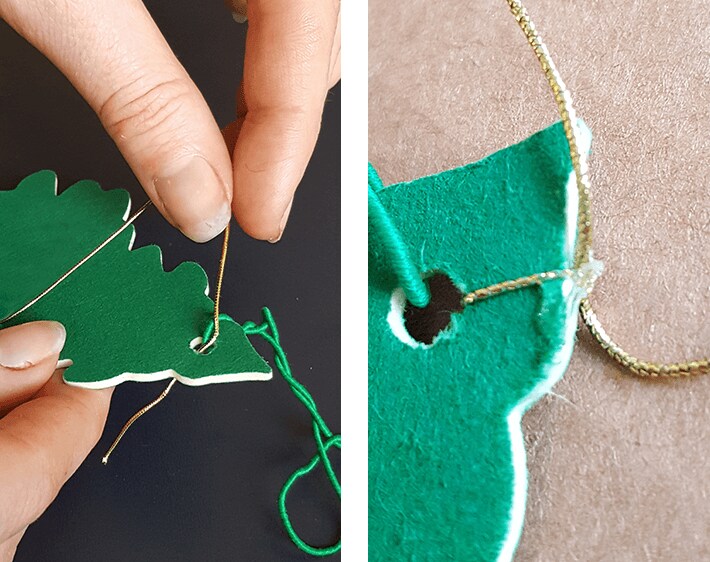
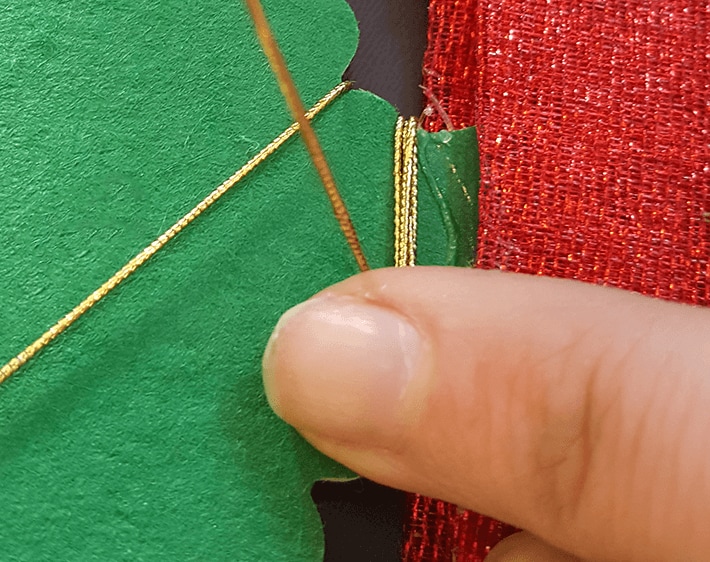
Step 1: Loop the string through the top hole and tie a knot. Secure knot with a small amount of glue.
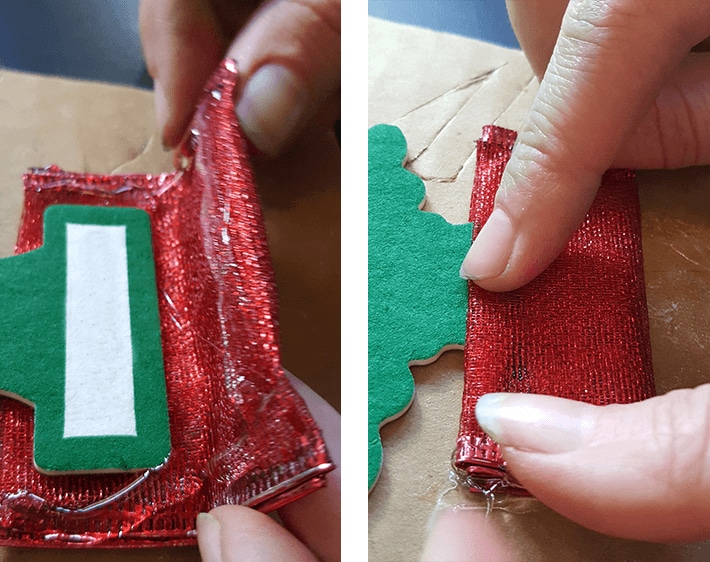
Step 2: Create a tree skirt with the ribbon or fabric cut to size. Fold and secure with glue.
Step 3: Thread ornaments through the string, securing with small knots. Then, drape the string and ornaments across the tree, like you would garland.

Step 4: Wrap the remaining string around the base of the tree and secure with a knot or glue. Trim any excess with scissors.
Step 5: Your tree is ready to hang!
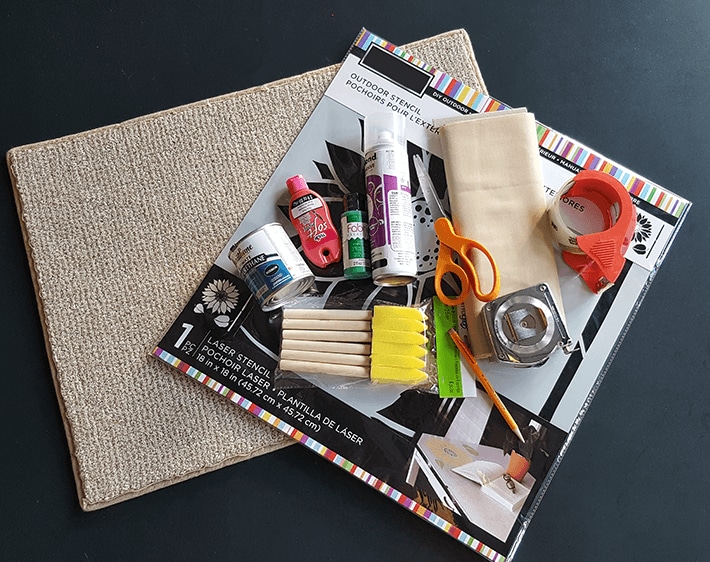
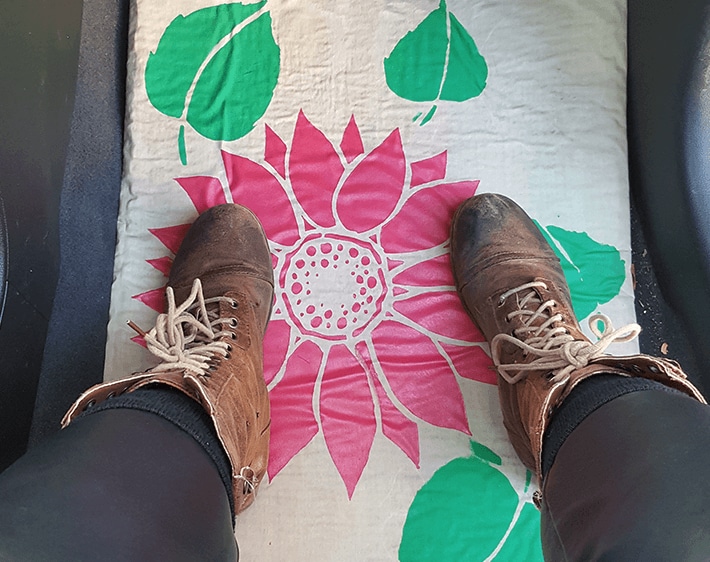
Holiday Floor Mats
Protect your car’s interior with a festive touch.
Materials:
- Mat or rubber sheet (If you can’t find one to fit your car, you can cut one to fit using a utility knife)
- Outdoor fabric
- Spray adhesive
- Fabric paint
- Water-based polyurethane
- Paintbrush
- Stencil
- Scissors
- Duct tape
- Measuring tape
- Iron (optional)
- Utility Knife (if cutting mat runner)
Steps:
Gather materials
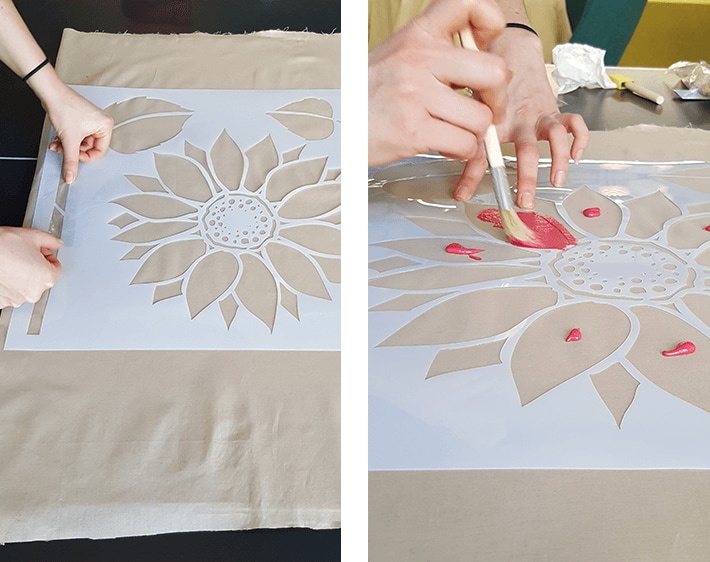
Step 1: Place the mat on the fabric and cut so you have about 5 extra inches on all sides.
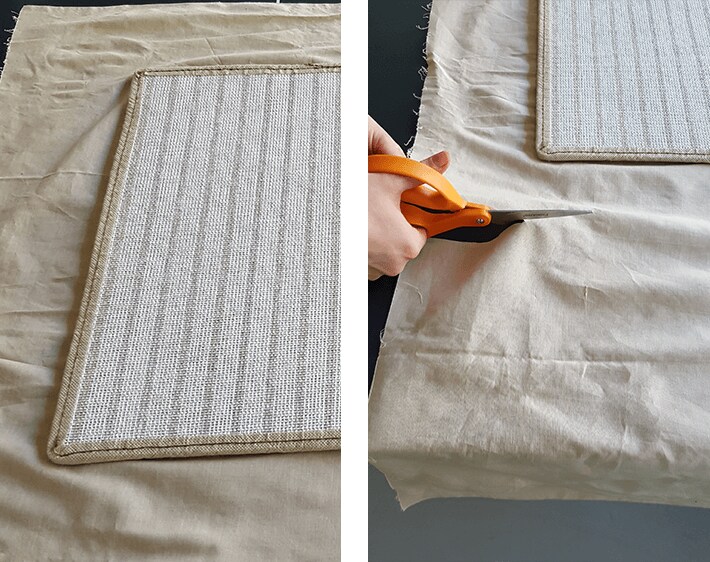
Step 2: Lay fabric on a flat, hard surface you can paint on. We temporarily taped ours to a foam board to keep it secured. (NOTE: you may want to iron your fabric first.)

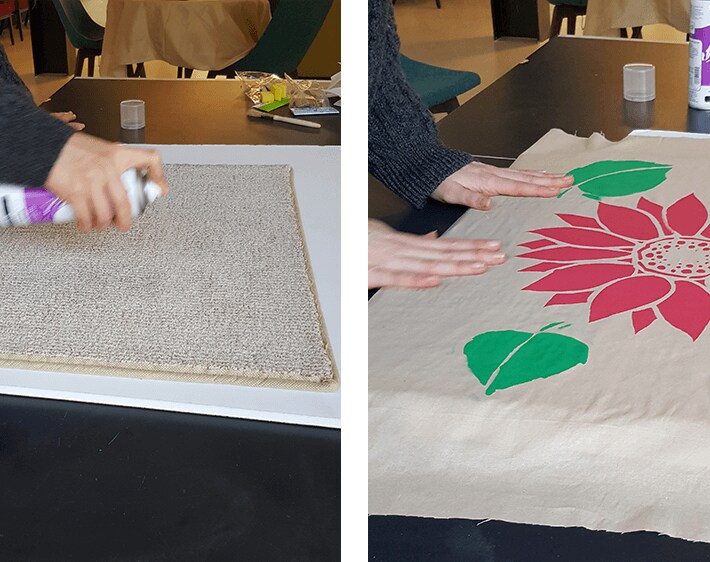
Step 3: Paint your fabric with a stencil, stamps or free-hand. Allow to dry.
Step 4: Spray the adhesive to the top side of the mat and the backside of the fabric and position fabric, smoothing out any wrinkles with your hands.
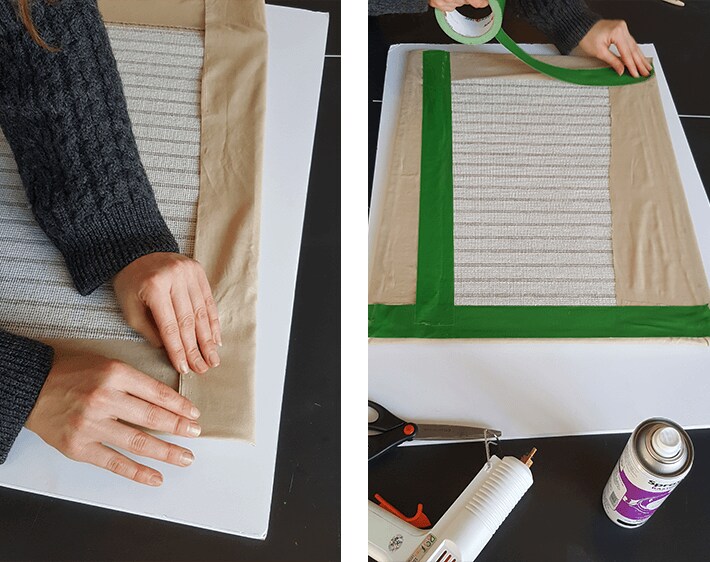
Step 5: Once everything’s in place, turn the mat over and fold the excess fabric to the back, securing it with adhesive or hot glue. You can also use duct tape to hold fabric edges down. (Don’t worry, no one will see it!)
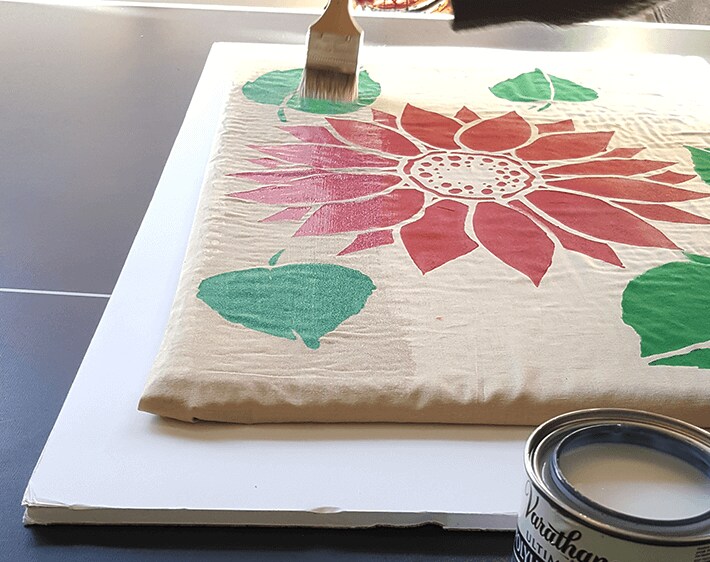
Step 6: Brush a thin coat of polyurethane and allow to dry. This gives your mat extra protection against the elements, so feel free to use multiple coats.
Step 7: Place finished mats in your car. Ta-da!
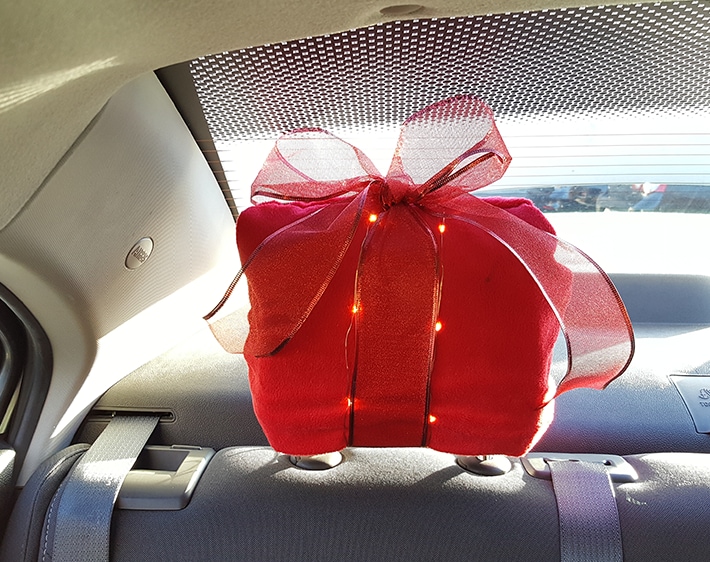
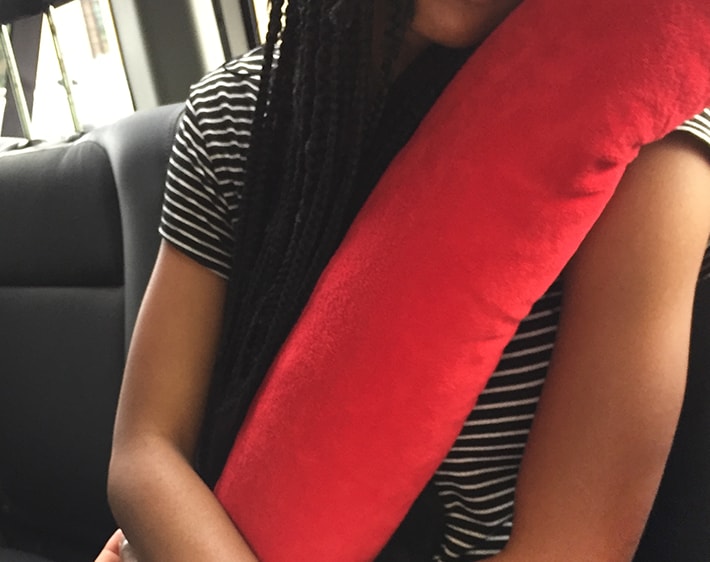
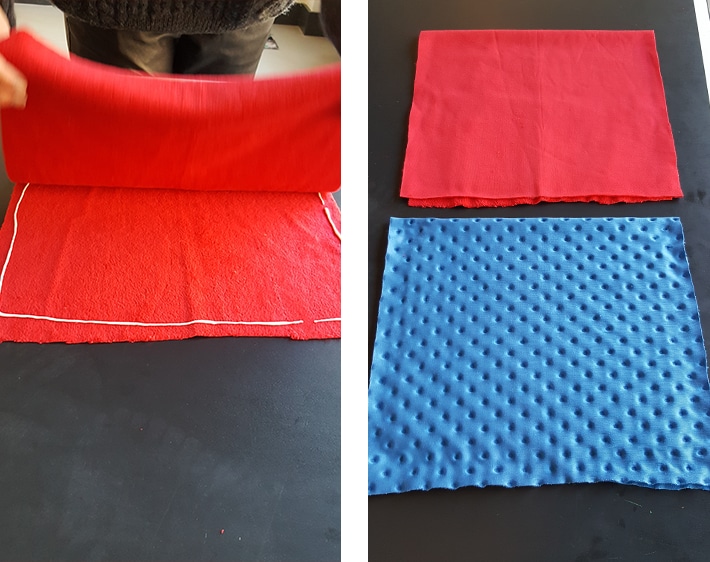
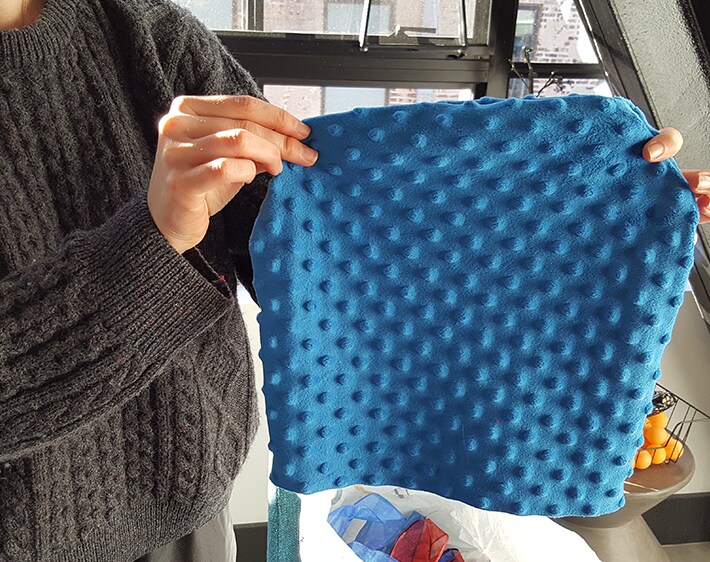
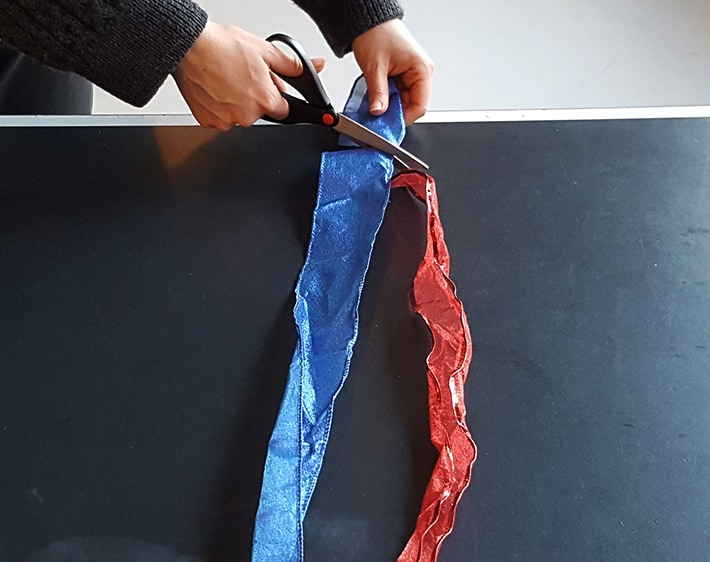
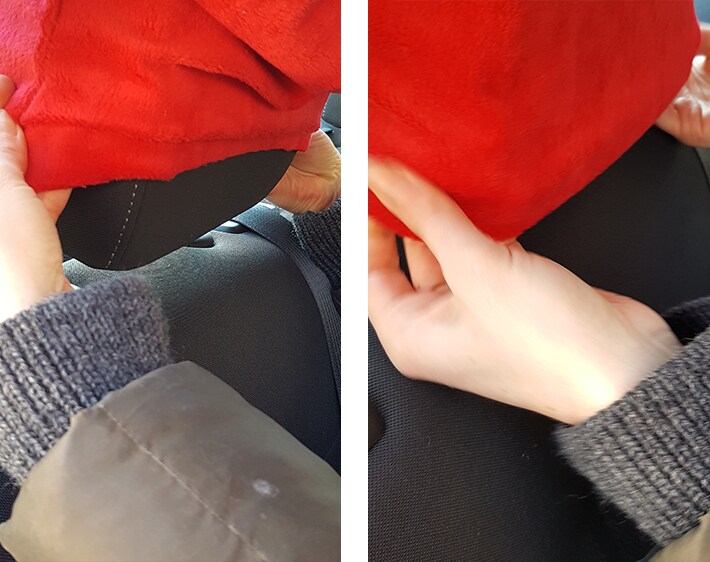
Festive Headrest Covers
Add some seasonal flair to your holiday road trips
Materials:
- Fabric (look for fabric that has a bit of stretch)
- Ribbon
- Fabric glue
- Scissors
- Measuring tape
- Pencil
Steps:
Gather materials
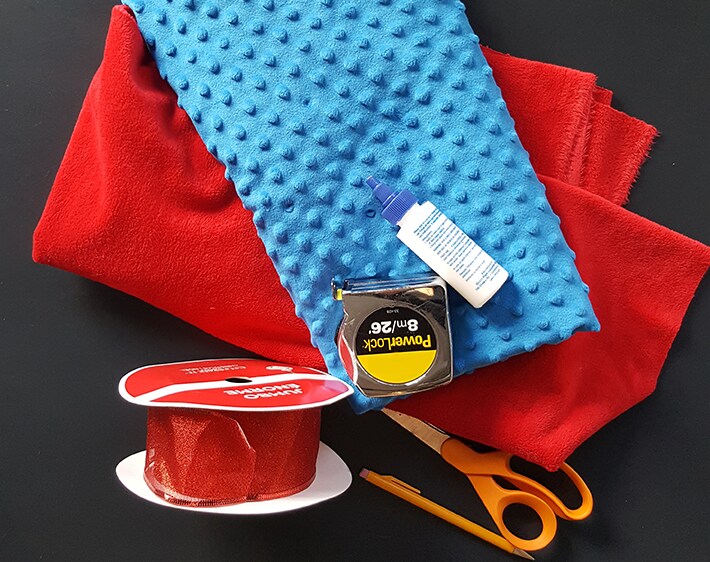
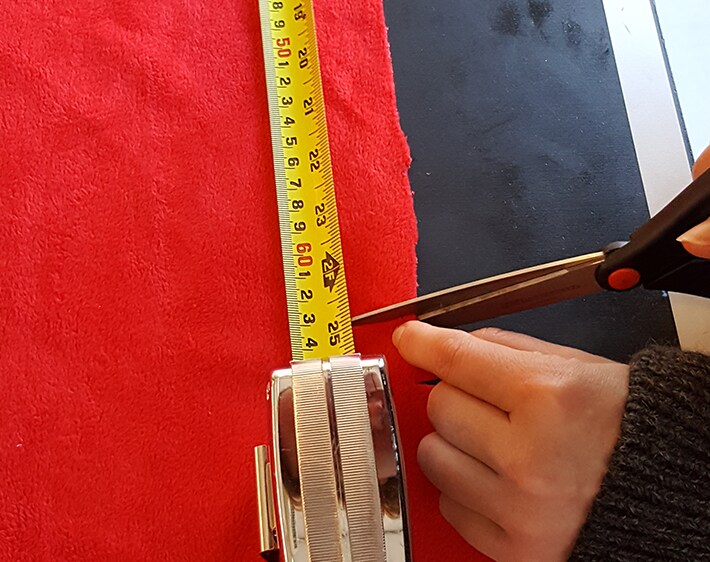
Step 1: Measure headrests including width, height and depth. Cut fabric based on measurements. For example: our headrest was 8.5 in X 8 in X 5 in – so we cut our fabric 14 in wide (8.5in wide + 5in deep = 13.5 and we rounded up), 25 in tall (8in tall for front side + 8 inches tall for backside + 5 in deep = 21. We then added 4 inches to have a little extra space – you can always cut or tuck in any excess.
Step 2: Lay the fabric face side up (i.e., the side you want to show) and run a thin line of glue around half of the fabric, as shown.
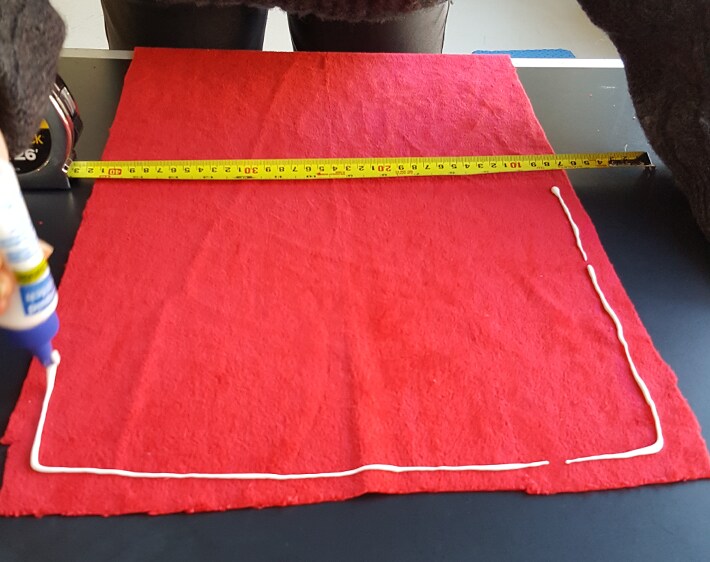
Step 3: Fold the fabric in half and pat the edges with the glue to secure and let dry.
Step 4: When thoroughly dry, cut the unglued side open to create a ‘pillowcase’ and turn inside out.
Step 5: Cut a long piece of ribbon (ours was 35 in) to use as your trim.
Step 6: Pull your new cover down over your headrest and tuck in any excess fabric.
Step 7: Wind the ribbon under the headrest and tie a bow at the top to complete your headrest ‘gift’. We added a few lights for an extra festive touch.
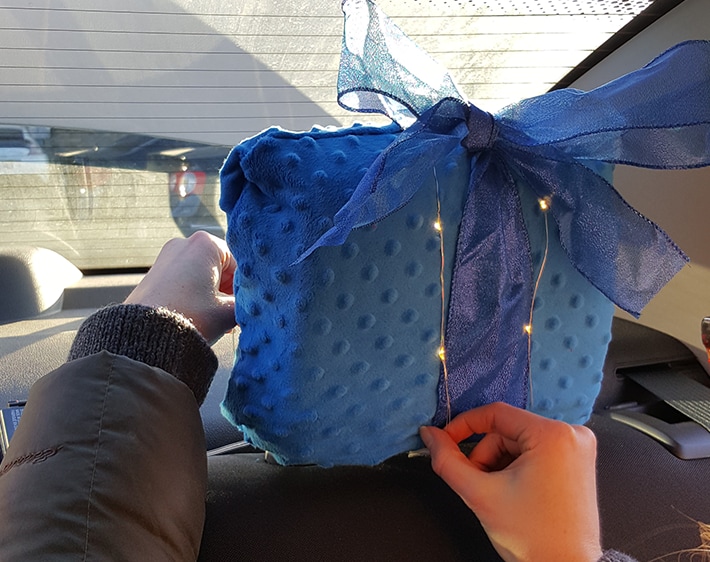
Step 8: Let the holidays begin!